Synth Drums in SuperCollider
In the first post on this blog, I started an introduction to a GitHub repo which defines a house beat. In this followup post, I’m going to look at how the drums in this beat work.
First off, here’s what the beat sounds like:
There are five types of sound in this beat:
- Sample playback (the clap, the open hi-hat)
- Simple drum synthesis (the crash, the closed hat, etc.)
- Complex drum synthesis (the ride)
- A bell-like synthesizer patch
- A riser
The riser is complex enough that I’m going to save it for another post. Plus it’s not a drum. The bell-like patch is something I copied from Bruno Ruviaro. I found his code for the synth on sccode.org (which currently has an invalid SSL cert, sorry), but I actually found it while taking a workshop on SuperCollider at CCRMA 2018, and Bruno was teaching this workshop (along with Fernando Lopez-Lezcano). It’s a pretty cool sound, and when it came to getting this code up and running in the workshop, Bruno was instrumental in that (sorry for the pun). But it’s not a drum either, so I’m going to skip it for now.
This leaves three drum categories:
- Sample playback (the clap, the open hi-hat)
- Simple drum synthesis (the crash, the closed hat, etc.)
- Complex drum synthesis (the rides)
I’ll explain them in that order.
Sample Playback Drums
The simplest way to make a drum sound is to take a recording of a drum sound and play it back. It’s barely even the “Hello, world” of drum synthesis. But it’s very useful, and it’s a good simple thing to explain if you’re new to SuperCollider. So let’s look at how it works.
Here’s the code which defines the sample playback “synthesizer.”
// set up clap sample
~clapBuffer = Buffer.read(s, "audio/11098__a43__a43-clap.aiff");

// set up open hat sample
~openHatBuffer = Buffer.read(s, "audio/165028__rodrigo-the-mad__mini-909ish-open-hat.wav");

// generic sample player synthdef
SynthDef("samplePlayer",{ arg out = 0, bufnum, amp;
  Out.ar( out,
    PlayBuf.ar(2, bufnum, BufRateScale.kr(bufnum), doneAction: 2) * amp;
  )
}).add;
First, the code sets up paths to its audio samples,
one each in the WAV and AIFF formats.
Technically these aren’t the real paths;
as explained in
the previous post,
a simple installer script will set you up with explicit pathnames for the audio samples.
After the file paths are set up,
we use SynthDef to define a synth —
basically an audio-generating function which you can address with a name —
which takes as its arguments the index of an audio bus,
the index of a buffer,
and an amplitude.
A buffer in this context,
like in so many others with file I/O,
is the in-memory storage of the data in the file.
Also note that Buffer.read returns not the buffer itself,
but the buffer’s index,
so reading the file and keeping track of the index is all you need to use SuperCollider’s API here.
A reasonable person could at first glance think that
this is a strange design decision, and maybe expect Buffer.read to return the buffer itself.
Likewise, passing around the index for the output bus is a bit weird when you could just be working with the bus itself.
My best guess is that you can’t just work with the bus itself,
and that this weirdness, like most computer-related weirdness, is due to distributed systems.
SuperCollider uses a client/server architecture,
which is beyond the scope of this blog post,
but which would explain why the language could only work with references to buses and buffers,
and not have direct access to those buses or buffers themselves as objects.
Anyway, the most important line in our sample player is here:
PlayBuf.ar(2, bufnum, BufRateScale.kr(bufnum), doneAction: 2) * amp;A PlayBuf is a SuperCollider object which plays an audio buffer.
The .ar here, and everywhere in SuperCollider, means that we’re going to send signals out from this object at audio rate.
The 2 signifies two channels, i.e., it’s a stereo sample.
The bufnum is the index of the buffer object that we’ll be getting our audio information from.
The next parameter we’re passing in is our rate,
i.e., the speed at which we’ll be playing back the sample.
We calculate this with the help of a BufRateScale object,
and we get data from that object at control rate (which is what .kr always means in SuperCollider).
Think of audio rate and control rate as equivalent to
audio signals and control voltage in Eurorack modular synthesis.
Everything within the {} in the SynthDef is essentially a callback function
that will be invoked later, like a callback function in Node.js,
so obviously we’re not saying “play this PlayBuf now.”
We’re setting up "samplePlayer" as the name for the “synthesizer” which will play
the PlayBuf whenever we need it to, later on.
To be more specific, let’s look at when that “later on” arrives.
This is the code from timing.scd and pbinds.scd which specifies when the clap and hat samples will play:
// set up when to play the clap
~clapAmps = [ 0, 0, 0, 0, 1, 0, 0, 0, 0, 0, 0, 0, 1, 0, 0, 0 ]; // 16 beats

// timing for sampled open hat
~sampledOpenHatAmps = [ 0, 0, 1, 0 ];

// sample player: clap
Pbind(
  \instrument, \samplePlayer,
  \dur, 1/4, // 16th note is one quarter of a beat!
  \bufnum, ~clapBuffer,
  \amp, Pseq(~clapAmps, inf)
).play(mainClock);

// sample player: hat
Pbind(
  \instrument, \samplePlayer,
  \dur, 1/4, // 16th note is one quarter of a beat!
  \bufnum, ~openHatBuffer,
  \amp, Pseq(~sampledOpenHatAmps * 0.65, inf)
).play(mainClock);
A Pbind in SuperCollider represents a pattern binding,
which is to say a connection between a pattern to play
and the sounds which will play it.
A PlayBuf doesn’t take specific notes,
so these Pbind objects just take arrays of amplitudes,
which is to say numbers between 0 and 1 which represent loudness.
In the hat pattern binding, the code multiplies the loudnessnesses
by 0.65 as a way of quieting their overall volume a little.
If this conflation of triggering the sound and adjusting its volume bothers you, it’s also possible to separate them by using gates, which are similar to the gate signals used in analog sequencers, but we won’t get into that in this blog post.
You may be wondering why ~clapAmps has 16 elements,
but ~sampledOpenHatAmps only has 4.
The answer is that,
after hand-coding all 16 elements in ~clapAmps,
I noticed this was wasteful,
and used a terser syntax in ~sampledOpenHatAmps.
That’s it.
SuperCollider will turn both arrays into infinite sequences,
since they’re passed into Pseq with an inf argument,
so in this case it doesn’t matter how long they are.
Subtractive Synthesis Drums
The simplest subtractive drum in this beat is the crash.
// crash
SynthDef("crash", { arg amp = 1;
  var whiteNoise = PinkNoise.ar(
    mul: Env.perc(releaseTime: 4, curve: -7).kr(doneAction: 2));
  Out.ar(0, Pan2.ar(HPF.ar(whiteNoise, freq: 7040)) * 4 * amp);
}).add;
Here’s how it sounds.
There are more sophisticated ways to make a cymbal sound, but this is a nice simple example to start with. Let’s dig into the code.
As usual, this part means “create a sound-generating callback function named ‘crash’, and add it to the in-memory synth registry”:
// crash
SynthDef("crash", {...}).add;
Now let’s expand that ellipsis.
{ arg amp = 1;
  var whiteNoise = PinkNoise.ar(
    mul: Env.perc(releaseTime: 4, curve: -7).kr(doneAction: 2));
  Out.ar(0, Pan2.ar(HPF.ar(whiteNoise, freq: 7040)) * 4 * amp);
}
Starting off, arg amp = 1; just means that the callback function takes one keyword argument, named amp, with a default value of 1.
So far so good.
Next we create a whiteNoise variable,
which is actually generated by invoking the ar method on a PinkNoise
UGen.
(A UGen is a unit generator, i.e., something which makes sound.)
.ar, as always in SuperCollider, means we want audio rate output, i.e., sound.
We pass in just one argument, mul, which stands for “multiply.”
SuperCollider will multiply the output from the PinkNoise UGen by the value of mul.
As you can see, that value is a little complex:
mul: Env.perc(releaseTime: 4, curve: -7).kr(doneAction: 2))Env.perc creates a percussive
envelope,
and .kr sends the output of that envelope as a control signal.
I’m not sure what the release time’s units are, but it might be seconds.
At any rate, this value of 4 gives us a longer release than the default of 1,
and that longer release makes sense for a crash cymbal.
Likewise, the -7 curve means that the release curve of this envelope
is gentler than the percussive envelope’s default.
The magic number 2, for doneAction,
is equal to the value of Done.freeself —
an important constant in SuperCollider —
and means that we want the UGen to free its own memory after it plays.
This is a very important bit of bookkeeping;
without it, SuperCollider will not free up the UGen.
In this code, you create a new synthesizer in SuperCollider’s memory every time you play this drum.
If you’re not freeing up those resources once you’re done with them,
you could get audio glitching and other memory problems very quickly.
Anyway, at this point we’ve created a crash cymbal sound. Now we have to play it. That’s what the next line does:
Out.ar(0, Pan2.ar(HPF.ar(whiteNoise, freq: 7040)) * 4 * amp);As is often the case in SuperCollider,
this code works by chaining library objects and invoking them at audio rate via their .ar methods.
The Out object simply sends audio to an output bus.
SuperCollider will set you up with one output bus by default,
and its list is zero-indexed, so that’s the first argument to Out.ar.
The second argument is an array of channels,
and Pan2.ar simply takes one channel and splits it into an array of two channels,
i.e., a stereo pair.
We use amp to define when the crash will play,
just like with the sample playback drums above,
and we multiply the amp value by 4 to boost the volume a bit.
We also wrap the whole thing in a high-pass filter, using HPF.ar,
and set the frequency to 7040, which is a high octave of the note A.
(All of the drum sounds in this beat are tuned to A, or notes in the A minor scale.)
The pattern playing mechanism is similar to what we’ve already looked at above for the sample playback drums. If you want to take a deeper look, the code is on GitHub. For now, let’s look instead at a very similar drum: the synth hi-hat. Above, we saw the code which plays a sampled open hi-hat. But this beat also contains a synthesized hi-hat, and the code will look very familiar.
// basic synth hat
SynthDef("hat", { arg amp = 1, startPan = -1, endPan = 1, pitchVariation = 0, release = 0.1;
  var whiteNoise = WhiteNoise.ar(mul: Env.perc(releaseTime: release, curve: -7).kr(doneAction: 2));
  Out.ar(0, Pan2.ar(BBandPass.ar(whiteNoise, freq: pitchVariation, bw: 1), pos: Line.kr(startPan, endPan, 4)) * amp);
}).add;
This is almost the same drum.
The code uses a much shorter default release time of 0.1,
accepts release as an argument, and accepts some other new arguments as well:
startPan, endPan, and pitchVariation.
Instead of always setting a high-pass filter at 7040,
it instead sets a band-pass filter to whatever frequency pitchVariation represents.
It also sets the pan position using a linear control rate
“drawn” between its start and end points:
pos: Line.kr(startPan, endPan, 4)One of the weirdest things about the syntax of SuperCollider’s language
is that, when you use keyword arguments, the names are optional.
(It’s not optimized for clarity, but for live-coding.)
The “4” in the above code could also be written as dur: 4, and specifies a duration of 4 seconds for the panning.
You might be wondering where startPan, endPan, release, and pitchVariation come from.
They’re here:
// set up when to play the hats
~hatAmps = [ 0.1, 0, 1, 0, 0, 0, 1, 0, 0.1, 0, 1, 0.1, 0, 0.1, 1, 0 ]; // 16 beats
~hatStarts = [ 0.5, 0, -0.5, 0, 0.7, -0.7 ]; // hat pan timing
~hatEnds = [ -0.7, 0, 0.7, 0, 0.5, -0.5 ]; // hat pan timing
~hatReleases = [
  0.1, 0.2, 0.1, 0.3, 0.2, 0.3, 0.5, 0.6,
  0.2, 0.1, 0.3, 0.3, 0.1, 0.2, 0.4, 0.2,
  0.1, 0.2, 0.2, 0.3, 0.1, 0.3, 0.3, 0.4,
  0.2, 0.1, 0.3, 0.3, 0.1, 0.2, 0.4, 0.2,
  0.1, 0.2, 0.2, 0.3, 0.1, 0.3, 0.3, 0.4,
  0.2, 0.1, 0.3, 0.3, 0.1, 0.2, 0.4, 0.2,
  0.1, 0.2, 0.3, 0.4, 0.2, 0.3, 0.1, 0.3
]; // hat release times

Pbind(
  \instrument, \hat,
  \dur, 1/4, // 16th note is one quarter of a beat!
  \amp, Pseq(~hatAmps, inf),
  \startPan, Pseq(~hatStarts, inf),
  \endPan, Pseq(~hatEnds, inf),
  \pitchVariation, Prand([3520, 2637, 7040], inf),
  \release, Pseq(~hatReleases, inf)
).play(mainClock);
The pitchVariation comes from a Prand, which returns an infinite sequence of random values
selected from the [3520, 2637, 7040] array.
In other words, the band-pass filter lets frequencies through at two octaves of A, plus one octave of E.
The other values come from ordered infinite sequences via Pseq,
which simply repeat their arrays forever.
In practice, this means that the panning follows a six-step pattern where each step takes four seconds.
The releases follow a 56-step pattern, and the amps follow a 16-step pattern.
This means that just the combination of the release and amp configuration needs to play for 112 beats, or 28 bars, before it repeats. However, if you factor in the 6-step sequence of 4-second panning patterns, and consider that the changes in pitch are entirely random, you have a hi-hat rhythm which is never the same thing twice. It never repeats. Instead, there’s a lot of variety and polyrhythm in these hats. Their pitch changes, their pan position changes, their release time changes, and their volume changes. It’s just a subtle variation in a background sound, but I’m pretty happy with it. Here’s what it sounds like.
That’s it for the subtractive drums in this beat, except to note that I took the kick and the snare from an excellent blog called Rumblesan. Check out those posts if you want to understand how those drums work.
Now, let’s move on to the most complex drum in the beat.
Complex Synthesis Drum
This is the ride, aka “zaps.” I explained this briefly in the previous post, but I’ll get into more detail about the synthesis here. Here’s how it sounds:
Here’s the code:
SynthDef("zaps", { arg amp = 1, modFreq = 15, carFreq = 880, modDepth = 3250;
  var car, mod, env;

  env = Env.perc(releaseTime: 0.3).kr(doneAction: 2);
  mod = Pulse.ar(freq: modFreq * [1, 1.14, 0.97, 6, 7, 8, 9, 10, 1.04, 1.2], mul: modDepth);
  car = Pulse.ar(freq: carFreq + mod * [1, 1.41, 0.99, 2.4921, 5, 6, 1.397], mul: env);
  car = Splay.ar(car);
  Out.ar(0, FreeVerb.ar(HPF.ar(car, freq: 5274), mix: 0.05, room: 0.1, damp: 0.9, mul: amp * 0.5));
}).add;
Beyond the usual amp, this synth’s callback function has three arguments we haven’t seen before:
modFreq, carFreq, and modDepth.
Likewise, although you probably recognize the Env.perc and HPF.ar from the subtractive examples,
Splay and Pulse are new.
Let’s start with a little context. Although I think it didn’t quite happen, I originally intended to produce this sound via frequency modulation (FM) synthesis. Where subtractive synthesis works by establishing a sound and then filtering frequencies out of it, FM synthesis works instead of by taking one sound and then using another sound to modulate it. Another way to think of it, in comparison to subtractive synthesis, might be to consider it multiplicative synthesis, because when you modulate one frequency with another, you are basically multiplying the two frequencies.
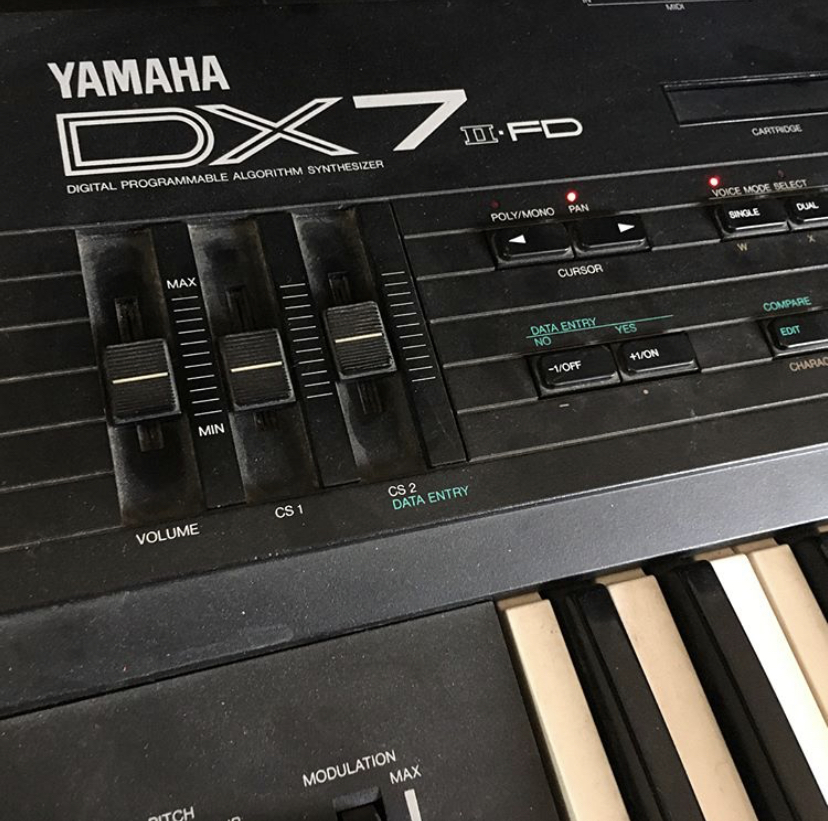
As I mentioned before, I wrote this beat during a summer workshop at CCRMA, the computer music research department at Stanford. For decades, the most profitable patent to come out of Stanford was an FM synthesis patent developed at CCRMA. This patent was the foundation of the Yamaha DX7, an incredibly popular synthesizer during the 1980s. At a party near the end of the workshop, one of the CCRMA researchers played a playlist of non-stop 80s hits powered by the DX7. There was also a DX7 in the lobby. Here it is.
Anyway, in FM synthesis, you have a minimum of two frequencies.
The base frequency is called the carrier, and the modulating frequency is the modulator.
That’s what car and mod are in this code.
Likewise, carFreq and modFreq are the frequencies of these two sounds.
We produce each sound using a square wave,
which is what Pulse.ar produces.
That’s roughly what these two lines of code are doing:
mod = Pulse.ar(freq: modFreq * [1, 1.14, 0.97, 6, 7, 8, 9, 10, 1.04, 1.2], mul: modDepth);
car = Pulse.ar(freq: carFreq + mod * [1, 1.41, 0.99, 2.4921, 5, 6, 1.397], mul: env);
But these two lines of code aren’t just producing square waves. This is what that simpler case would look like:
mod = Pulse.ar(freq: modFreq);
car = Pulse.ar(freq: carFreq);
So we’re doing a few additional things:
- passing
mul: modDepth - passing
mul: env - combining
carFreqandmodwith addition - multiplying each frequency value by an array
First, we’ve seen code like mul: env before, so let’s get that one out of the way.
SuperCollider multiplies the volume of a given audio source by whatever argument you pass to mul.
With mul: env, we’re passing our Env.perc to mul, so we’re applying a percussive envelope to the sound’s volume.
The other use of mul is a little more exotic.
In this case, we’re multiplying it by modDepth to specify how weak or strong the modulator waveform will be.
The code uses 3250 because it produces a very intense modulator wave,
and because 3250 is an octave of the note A.
There’s no real reason to expect 3250 to produce a properly tuned sound here;
frequency modulation is notoriously chaotic in its output.
I just used this frequency because I’d been using it for other things,
and I kept it because it worked.
Anyway, combining carFreq and mod with addition
gets us a combination of sounds which I think is maybe more additive synthesis than FM.
I did this in a hurry towards the end of the workshop.
However, it sounded pretty good.
This is kind of how SuperCollider works sometimes.
You start with a cool idea, get it slightly wrong, but keep it because it sounds good.
Moving on, multiplying each sound by an array means creating many slightly modified copies of the same sound.
This gives us a lot of polyphony for very little effort,
with the consequence that there’s a lot of different frequencies in the “zaps” sound,
and it has the kind of noisy high end that a ride should have.
Finally, our call to Splay
just pans these many ride voices across the stereo space.
Conclusion
So there you have it: a tour of the drum sounds (and, to a lesser extent, sequencing) in a SuperCollider house beat. We saw how SuperCollider can do simple, typical subtractive drum sounds, how it can automate parameters like release, pan, and band-pass filter frequency to create patterns with a lot of organic variation, and how its algorithmic approach to sound definition can cause an attempt at FM synthesis to take an interesting detour into additive synthesis instead. It’s a quirky beast, but it offers unique expressive opportunities, and although it can be a challenge to work with, it can also be very rewarding.
The next post explains how the riser works in this beat, and there’s some more music in SuperCollider which I hope to explain after that. Stay tuned!